If you’re looking for instructions on how to apply Android icon packs, you’re in the right place. I made this little How-To guide for applying icon packs for newcomers to the Android theme world. Here’s a video tutorial or keep scrolling for a text guide.
1. Download a launcher that supports icon packs
If your stock launcher doesn’t support icon packs, you’ll need a third-party launcher. Launchers are key to unlocking a ton of personalization tweaks that you don’t get with your stock interface. I recommend Nova Launcher, but there are a plethora of great ones and it’s hard to go wrong with any of the popular launchers on the play store.
If you want to keep your stock launcher, Shortcut Maker can apply icons by changing your system files without needing a 3rd party launcher.
Here’s a list of popular launchers that support icon packs:

Nova Launcher
Microsoft Launcher
Lawnchair

Total Launcher
2. Download a theme
There are TONS available on the Play Store. Choose wisely.

Lines – Icon Pack

Flight – Icon Pack

Flight Dark – Icon Pack
3. (Optional) Apply the theme via the icon pack
There are a couple of ways to apply an icon pack. Through the Icon Pack app, or through your launcher’s settings.
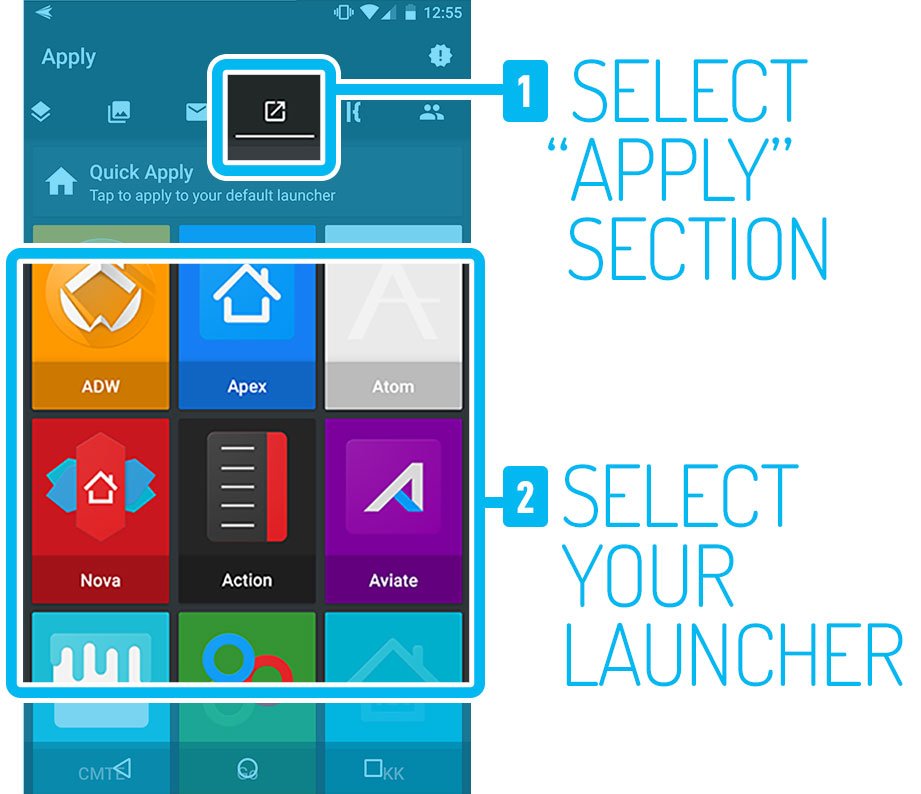
Most themes these days have in-app options for applying your theme. Once inside the icon pack app, navigate to the “Apply” screen and select your launcher. Here’s an example using Lines Icon Pack:
OR
4. Apply the theme via your launcher
I’m using Nova Launcher for these, but the others are very similar. The option to apply an icon pack are usually in Launcher Settings > Display, Home Screen, Theme, Personalization, etc > Icon Pack.
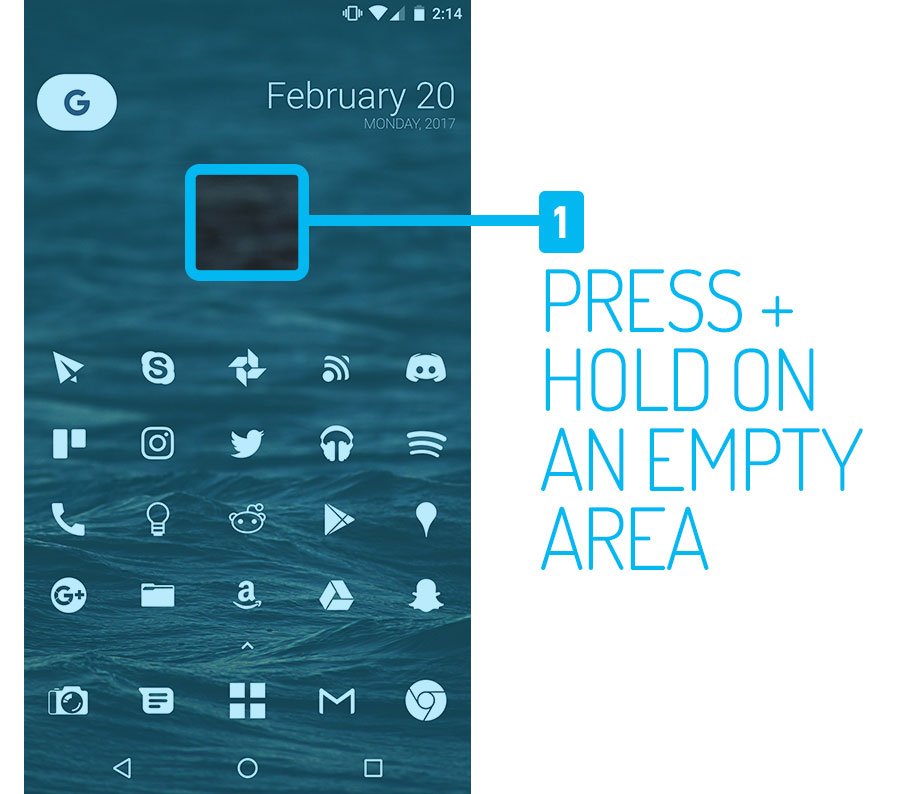
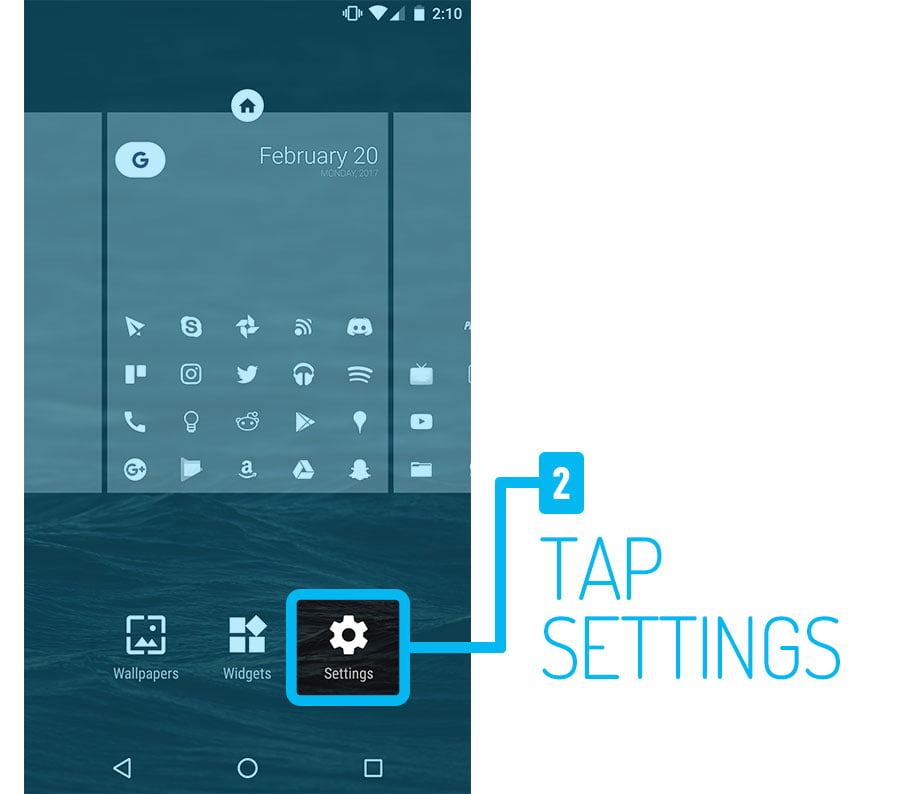
5. Press & Hold on an empty spot on your home screen.
6. Tap settings. You can also edit wallpaper, Live wallpapers and add widgets from this screen.
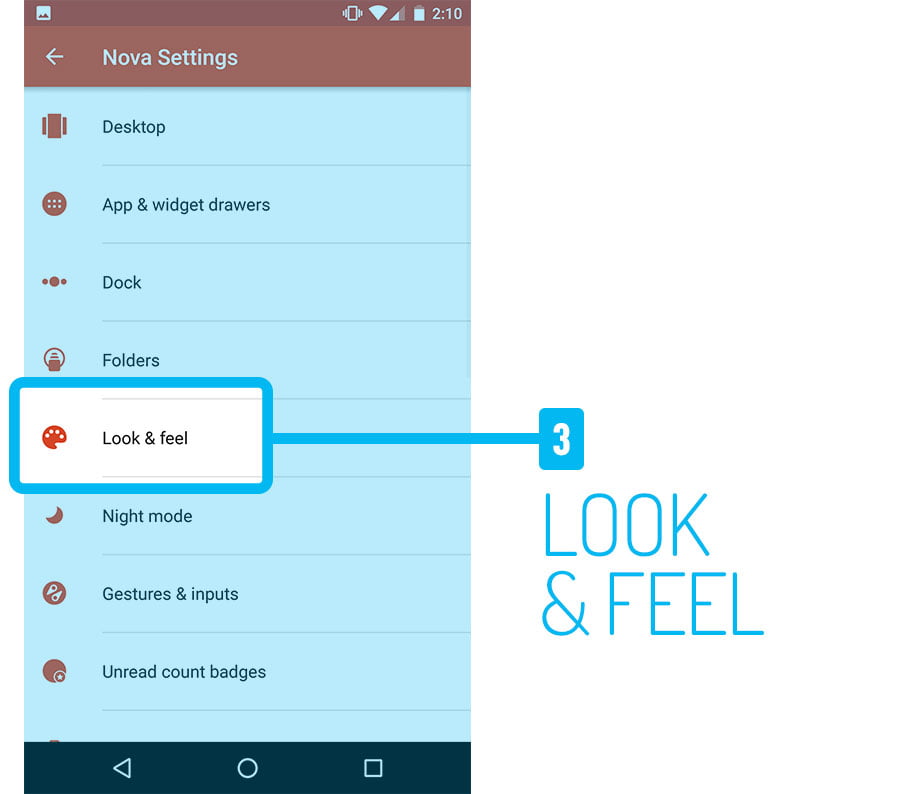
7. Look for “Display,” “Look & Feel,” “Personalization,” “Theme,” etc. This will vary depending on the launcher.
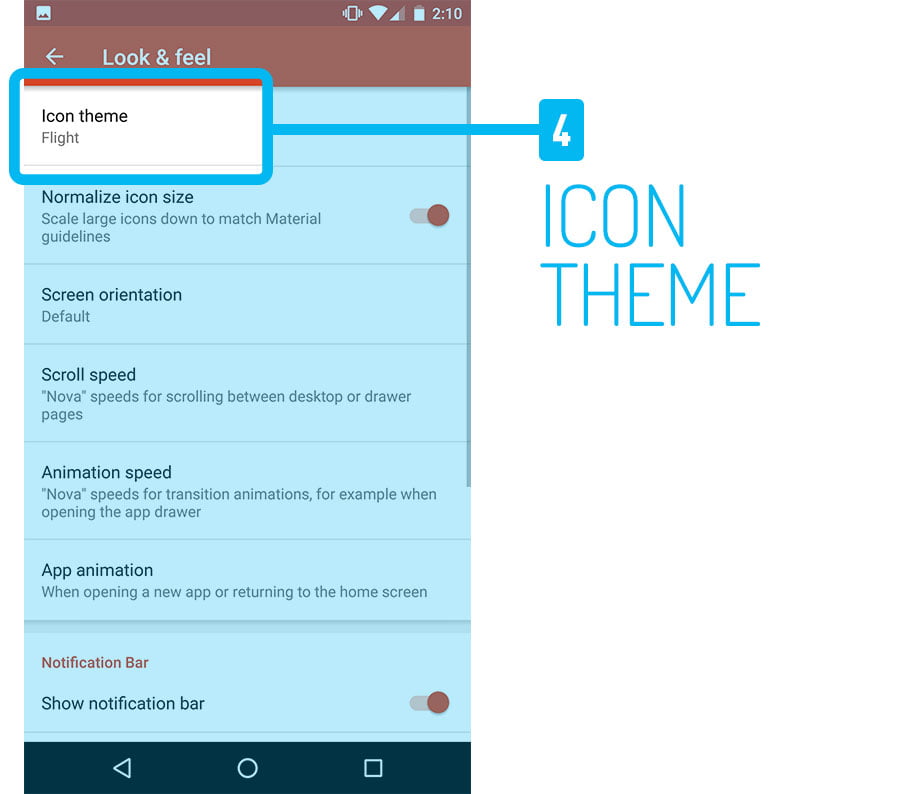
8. Look for Icon pack or theme options. In Nova, it’s called “Icon Theme.” This section can take a few seconds to load depending on your device.
9. Choose from your installed themes!
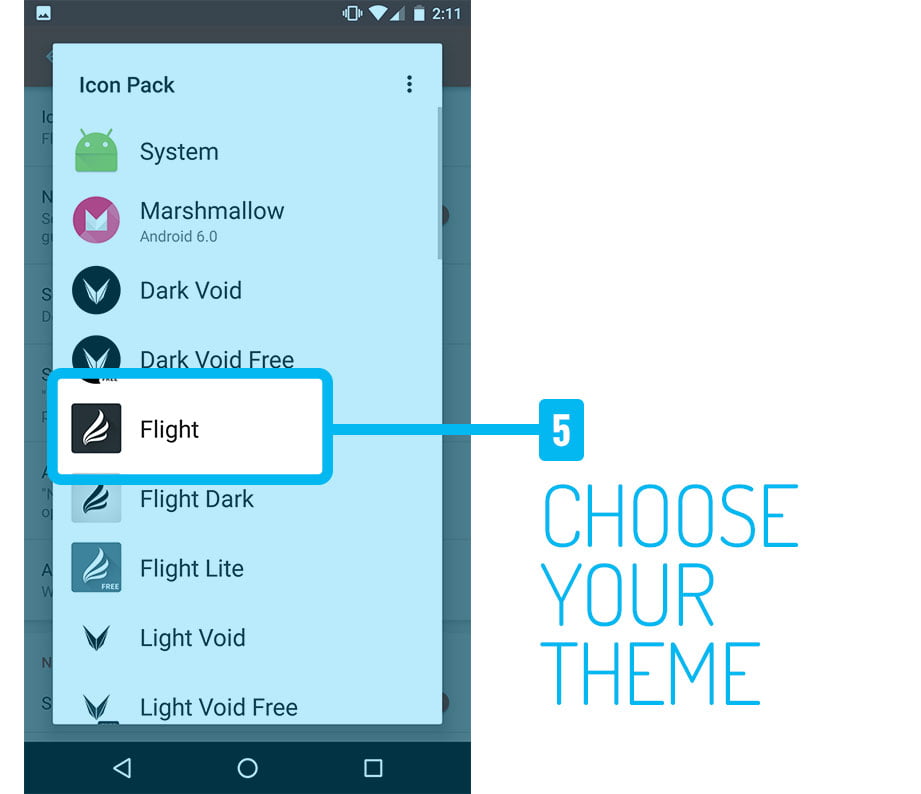
That’s it!
If you have any questions feel free to email me at [email protected] and I’ll do my best to answer them. If you’d like to see how to change your status bar and navigation bar icon colors keep reading!
See also: